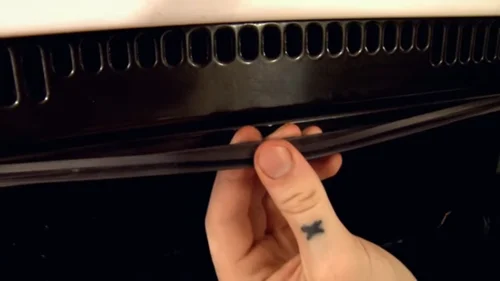
When your oven door won’t close correctly, it can lead to heat loss, uneven cooking, and potential safety hazards. In this comprehensive guide, we’ll explore the reasons behind a oven door that won’t close properly and provide step-by-step solutions to help you diagnose and resolve this frustrating issue.
Identifying the Issue
Before we dive into the causes and solutions, it’s important to recognize the signs of a oven door that won’t close properly. Here are some common symptoms:
- Visible Gap: When the oven is in use, you may notice a visible gap between the oven door, allowing heat to escape.
- Uneven Cooking: Unevenly cooked food, especially on the side where the door doesn’t close properly, can be a clear indication of the issue.
- Inefficient Heating: The oven may take longer to reach the desired temperature, leading to longer cooking times.
Common Causes of Improper Door Closure
Understanding why your stove door won’t close properly is crucial for effective troubleshooting. Let’s explore the typical culprits behind this issue:
1. Misaligned Hinges
- Symptoms: When hinges are misaligned, the stove door may not close evenly, leaving gaps or causing one side to remain partially open.
- Cause: Misaligned hinges can occur due to everyday wear and tear, frequent use, or accidental force applied to the door. Over time, this can lead to a misalignment that hinders proper closure.
2. Worn or Damaged Gasket

- Symptoms: The gasket, which seals the stove door, can wear out or become damaged over time. When this happens, it can lead to a faulty closure.
- Cause: The gasket, often made of heat-resistant material, deteriorates over time due to exposure to high temperatures and regular use. It can also be damaged by accidental impact or improper cleaning techniques, compromising its ability to provide an effective seal.
3. Debris or Food Particles
- Symptoms: Debris, such as spilled food or particles, can obstruct the stove door’s proper closure.
- Cause: Accumulation of debris around the range door can happen through everyday cooking and meal preparation. Spills, crumbs, and food particles can find their way into the door’s sealing mechanism, impeding its ability to close securely.
DIY Troubleshooting and Solutions
When your stove door doesn’t close properly, DIY troubleshooting and solutions can often resolve the issue without the need for professional assistance. Here are the steps you can take to diagnose and address the problem:
1. Adjusting Hinges
- Diagnosis: M isaligned hinges are a common culprit behind improper stove door closure. You can visually assess this by checking if the door is level and aligning correctly.
- Solution: To adjust the hinges:
Step 1: Turn Off the Stove – Prioritize safety by ensuring the stove is turned off and cool to the touch before any adjustments.
Step 2: Locate the Hinges – Identify the hinges on the stove door. These are typically attached on each side.
Step 3: Adjust the Hinges – Gently adjust the hinges to ensure they are properly aligned. This may involve loosening the hinge screws slightly, realigning the door, and then tightening the screws again.
Step 4: Test the Closure – After adjustment, test the door closure. It should now close evenly and securely.
Step 5: Follow Manufacturer’s Guidelines – Always consult the manufacturer’s guidelines for specific adjustments related to your stove model.
By correctly aligning the hinges, you can often restore proper door closure, ensuring the stove door closes evenly and securely.
2. Replacing the Gasket
- Diagnosis: A worn or damaged gasket can result in a poor door closure. You may notice tears, wear, or visible damage to the gasket.
- Solution: To replace the gasket:
Step 1: Turn Off the Stove – Ensure the stove is turned off and completely cool before any maintenance.
Step 2: Identify the Gasket – Locate the gasket that runs along the perimeter of the stove door. Inspect it for signs of wear, tears, or damage.
Step 3: Replace the Gasket – If you find the gasket to be in poor condition, consult your stove’s manual for specific guidance on gasket replacement.
Step 4: Remove the Old Gasket – Carefully remove the old gasket from the door, taking note of its position.
Step 5: Install the New Gasket – Follow the manufacturer’s instructions to install the new gasket. Ensure it is properly seated and provides an airtight seal.
Step 6: Test the Closure – After gasket replacement, test the door’s closure. It should now seal securely.
By replacing the gasket with a new and properly functioning one, you can restore an airtight seal, ensuring a secure closure of the stove door.
3. Cleaning and Clearing Debris
- Diagnosis: Obstructions such as food particles or debris can hinder the stove door from closing properly. A visual inspection can reveal these issues.
- Solution: To clean and clear debris:
Step 1: Turn Off the Stove – Prioritize safety by ensuring the stove is turned off and cool before cleaning.
Step 2: Inspect the Area – Examine the area around the stove door, including the crevices and the door’s sealing surface, for any debris, food particles, or spills.
Step 3: Clear Obstructions – Carefully remove any obstructions you find using a soft brush, cloth, or a vacuum cleaner with a nozzle attachment. Ensure that the area is clean and free from any hindrances.
Step 4: Test the Closure – After clearing the obstructions, test the door closure. It should now close properly without any impediments.
Regularly cleaning the area around the stove door is essential to prevent debris-related closure issues and maintain a secure and efficient seal.
Seeking Professional Help
For complex issues or if you’re uncomfortable performing these troubleshooting tasks, it’s advisable to seek professional assistance. Technicians have the expertise and tools to diagnose and fix more intricate problems, ensuring the continued efficiency and safety of your stove.